
Overview
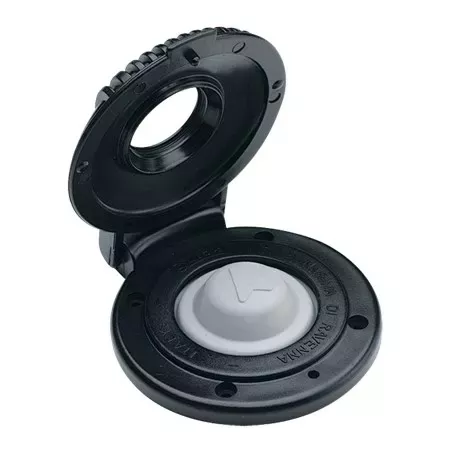
Harken® offers waterproof switches for electric and hydraulic systems to operate winches, furlers, and windlasses. These simple waterproof switches operate by finger or foot. A safety cover prevents accidental activation.
Specifications
| Specification | Value |
|---|---|
| Height (in) | 3/4 in |
| Height (mm) | 19 mm |
| Length (in) | 3 3/8 in |
| Length (mm) | 85 mm |
| Weight (g) | 95 g |
| Weight (oz) | 3.4 oz |
| Ø (in) | 3 in |
| Ø (mm) | 76 mm |
FAQs
Cable size range and gland seal diameter only apply to the BRS102; specific wiring details for BRS104 are not given.
The button must be installed on a flat surface.
The BRS104 requires 4 self-tapping screws of 3mm diameter for installation.
Use stainless steel A4 DIN 7982 or ISO 7050 screws for mounting, as screws of other materials may lack sufficient resistance.
The button should be installed on a flat surface to ensure proper fitting and function.
Installation screws should be stainless steel A4 DIN 7982 or ISO 7050 for resistance to loads and corrosion.
Apply sealant only in the areas where holes are made on the deck, avoiding the silicone covered electric actuator areas.
Do not install the button between two wooden lists; keep the holes on the same list for best strength and sealing.
Sealant should only be applied at the drilled holes, not between the silicone areas.
Apply sealant only to the holes made on the deck. Do not apply in areas covered by silicone protecting the actuator.
The BRS104 should be installed on a flat surface for proper mounting and sealing.
Ensure cables are well laid inside the button compartment and have not been deformed before closing the cover.
Remove drilling residues and clean/degrease thoroughly with isopropyl alcohol before installation.
Improper use or incorrect installation can cause extensive injury, equipment damage, or even death.
Lift the tilting cover so installation manoeuvres are easy, and secure the device afterward.
Keep the screw vertical during tightening, and ensure each is fully tightened with no residual slack.
For installing the Harken BRS104, use four self-tapping screws of Ø3mm, made from stainless steel A4 DIN 7982 or ISO 7050.
Always connect a fuse. For connection to any utility, a fuse should be connected as per the utility’s user manual.
Do not modify or replace any part with non-original Harken components, as this voids the warranty and is unsafe.
Before installing the BRS104 button, ensure the rear silicone indexing tab is properly seated in its slot.
Do not modify any part of the device. Modifications may cause malfunctions and will void the warranty.
Never replace any part with non-original Harken components. Using non-original parts invalidates the warranty.
Do not accidentally step on the switch; always ensure awareness of system limits and keep clear of moving parts.
The screws must be of stainless steel A4 DIN 7982 or ISO 7050 for corrosion and load resistance.
Do not accidentally step on the switch to avoid unintentional operation.
The button can be operated by hand or foot as described in the manual.
Check device operation and button integrity prior to each use, and ensure clear visibility and safety.
Press the button to activate the utility, release to disable. Operable by hand or foot.
Before each use, check the correct operation and integrity of the device and control buttons.
Contact the SailRACE team — as certified marine experts we’re happy to help with product selection, installation and after-sales servicing, before and after your purchase.